A few month ago I started to look at OpenVPN which has a very good GUI for the Mac called “Tunnelblick“. After I managed to set it up on my server I thought why not share my home directory via the VPN tunnel and mount it on my Desktop. It should be fairly usable, providet I’ve got sufficient net connection on my end, since my server has a 100MBit internet line. So I set up Samba and let it listen only on the VPN interface.
The following is a quick step-by-step how-to on setting up such a setup 🙂
Install OpenVPN on your server
Donwload the latest source from http://openvpn.net/download.html
Unpack it and run the usual commands:
./configure

make

make install
Then do some testing:
make check
If it all works fine, you’re good to go.
The other possibility is of course to install it from a package your distribution provides you, in my case this is handled by apt (aptitude install openvpn) which has the advantage of setting up init scripts so the VPN is startet at system boot and taking care that the whole environment on the server is suitable.
Configure OpenVPN on your server
We’re gonna work with a pre shared static key here because it is easier to set up and provides enough security for home use.
My config file on the server side looks as simple as following (/etc/openvpn/home.conf):
dev tun

ifconfig 10.8.0.1 10.8.0.2

secret static.key

comp-lzo

keepalive 10 60

ping-timer-rem

persist-tun

persist-key
This tells OpenVPN to start a new VPN on the “tun” device with the IP of 10.8.0.1 using the key named “static.key”. The rest are some tweaking commands which should be pretty self explanatory.
Now we only need the static key.
We can construct one by putting in the following command:
openvpn --genkey --secret static.key
The static key file is formated in ASCII and should be kept very private. Send one copy to the computer you would like to connect to your server and keep the other copy besides your config file on your server.
Install and set-up Samba
Next you need to install Samba. I again took the Debian way via “aptitude install samba”. Then I tweaked the standard setup to export the user’s home directories and listen only on the VPN interface and not the normal one.
interfaces = lo, 10.0.0.0/8

bind interfaces only = Yes
[homes]
comment = Home Directories
browseable = yes
writable = yes
create mask = 0775
directory mask = 0775
The rest of the smb.conf file can be pretty much left alone.
Start openvpn and samba
Provided you installed it via your packaging system or set up the init scripts yourself you can now start the two programs by typing in “/etc/init.d/openvpn start” and “/etc/init.d/samba start” (or wherever your distri keeps it’s init scripts).
If the two started up ok, you’re done on the server side.
Time to move on to the client.
Install Tunnelblick
Download it from www.tunnelblick.net, mount the Disk Image and double click on “Tunnelblick-Complete.mpkg” which installs all the necessary drivers and software packages. Now you should have a Tunnelblick icon in your Applications folder.
When starting the program for the first time, it will well you that there is no configuration file present and will offer you a sample configuration.
Simply replace the sample configuration with the following:
remote IP_OR_DOMAIN_OF_YOUR_SERVER

dev tun

ifconfig 10.8.0.2 10.8.0.1

secret static.key

comp-lzo

keepalive 10 60

ping-timer-rem

persist-tun

persist-key
As the last step you have to put the file “static.key” that you obtained from your server earlier in ~/Library/openvpn (this is where your config resides as well).
This should be it. Click on the Tunnel entrance symbol to the left of your Spotlight icon and choose your config, after a short moment the connection will be present.
The last thing to do is to mount your home directory.
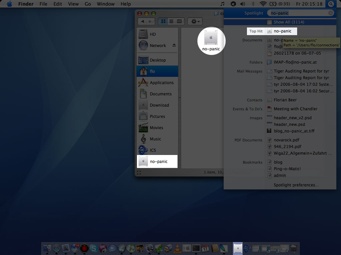
Press CMD+K in the Finder (or go to “Go -> Connect to Server” in the Menu) and type in the following:
smb://user@10.8.0.1/user
substituting “user” with your username on the server. After that a new icon should appear on your desktop containing all the files you have in your home directory on your server 🙂
 I use the really great macFUSE to mount several server directories via SSH on my work computer. One programm that makes this process really easy is Macfusion which offers a menu item and a standalone application to configure your mountpoints and mount/unmount them.
![]() After upgrading to Snow Leopard recently Macfusion & macFUSE stopped working, so I was searching for a solution and luckily found one at Racker Hacker – Fix MacFusion on Snow Leopard.
After upgrading to Snow Leopard recently Macfusion & macFUSE stopped working, so I was searching for a solution and luckily found one at Racker Hacker – Fix MacFusion on Snow Leopard.

