I’m now officially part of the planet.taoofmac.com HOORAY 🙂
…now I really have to blog a lot more 😉
Thanks to Rui Carmo for adding me and for running the planet!
I’m now officially part of the planet.taoofmac.com HOORAY 🙂
…now I really have to blog a lot more 😉
Thanks to Rui Carmo for adding me and for running the planet!
I set up scponly to permit some of my users, for whom I host websites, to use sftp/scp to transfer files to the server but refuse them to login with a fully functional shell. After configuring scponly to chroot to the users home directory and some initial tests it worked very well with Transmit on the Mac, Filezilla on Windows and Putty/Terminal. The only thing that didn’t work was using Dreamweaver in SFTP mode to connect to the server.
After a bit of digging around me & Herbert found out that Dreamweaver will only communicate with the SSH server if you change the config from the Debian-standard, refusing “tunneled clear text passwords”, to permiting it in /etc/ssh/sshd_config.
# Change to yes to enable tunnelled clear text passwords

PasswordAuthentication yes
After a quick /etc/init.d/ssh restart Dreamweaver was able to log in as well 🙂
To set up chroot for scponly on a Debian system do the following:
…simple as that 🙂
Aside from all the Mac frenzy over todays Keynote by Steve Jobs there was another interesting announcement: Google Earth for Mac.
I won’t write anything here about all the Apple announcements from Macworld’s opening, because you can read about it all over the place and I would just be duplicating old news 😉
Google Earth runs on Mac OS 10.4 and up and is coming out of beta status as of today. All of you who illegally took a sneak peek at it via the leaked beta should update as well, because there are a few features which weren’t quite ready in the leaked version.
edit: looks like it’s PowerPC only! Not very wise, after the first Intel Macs got announced today 😉
from petefreitag.com
While working today I had to write an error message that a user would see if their session had timed out. I was tempted to write something like:
Sorry your session has expired please login again.
But I quickly realized that the average user has no idea what a session is referring to, and why it has expired. In some cases the user may think that their account has expired. Users may also not understand what you mean by a timeout – that’s where you send the bad kids?Us web developers often throw technical jargon into our web applications without much thought. I’ve done it, and I’ve seen lots of messages that only a web developer would understand out there.
Lets try to be better about this, ok?
He’s right about that, I never really thought about that aspect of usability when writing error messages in my apps. I promise to amend 🙂
I thought I’d post a little howto on how I try to keep the data on the hard drive of my little iBook save. So without further ado… here it is:
 Next I partitioned the hard drive (using HFS+ for maximum compatibility under OS X) with one partition serving as the mirror for my internal 60GB disk. The rest of the disk is used as backup space for other data, right now we’ll only care about the mirror drive.
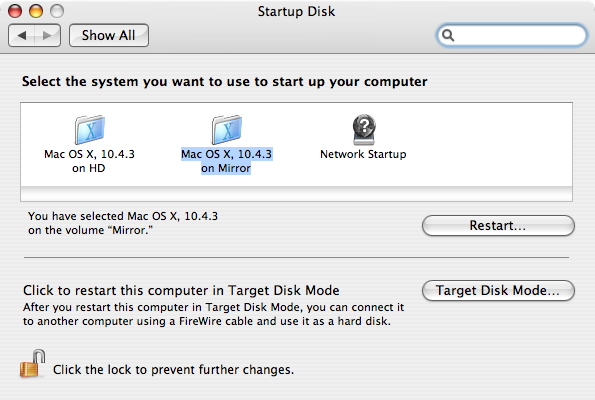 it as the startup disk in Mac OS X’s System Preferences and restarting the OS. It started up perfectly and I had the exact same system in front of me, except for the fact that it was running off the external FireWire drive and the internal disk was completely powered down.
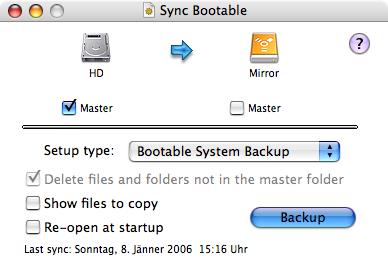 Again Google was my friend and after a few searches I came up with Synchonize! Pro X which has loads of options for possibly every synching need you might have or develop in the future. At the moment I’m just using the “Bootable System Backup” option to synch my internal disk with the external one.
I know it might not be perfect to do this just “whenever I think of it” (which is currently about twice a week) but it is still far more effective than my previous non-backup strategy which I kept running for over one year. Especially considered that I’m using my iBook on the road (at uni, at work etc.), always carriyng it around in my backpack which exposes it to the high risk of being damaged easily. With my current solutin my data is safe and I could even go to any arbitrary Mac, plug in the external drive, reboot and have my usual working environment running on the system.
edit: I know I could have maybe used Synchronize! X Pro for the entire progress of cloning and synching my hard drive. The reason I chose the detour over CCC was that I initially wanted to choose this programm for the synching as well but encountered that it was painfully slow and not as easy a one-click-solution as Synchronize! X Pro.