Ich habe schon längere Zeit die x-forwarding Funktion von SSH und den Apple Xserver vewendet um mir X Applikationen von diversen Linux Rechnern im LAN und über das Internet lokal anzeigen zu lassen. Was mich aber immer schon geärgert hat, ist dass ich nicht den kompletten Desktop, inkl. Windowmanager usw., einer entferntetn Maschine in einem Fenster am OSX Desktop darstellen lassen konnte.

Auftritt Xnest 🙂

Xnest ist ein X-Server und ein X-Client zugleich. Es benötigt einen laufenden X-Server und stellt seinerseits wiederum einen X-Server für alle in Xnest ausgeführten Anwendungen bereit.

Ich habe nun zwei mögliche Wege herausgefunden um das gewünschte zu erreichen:
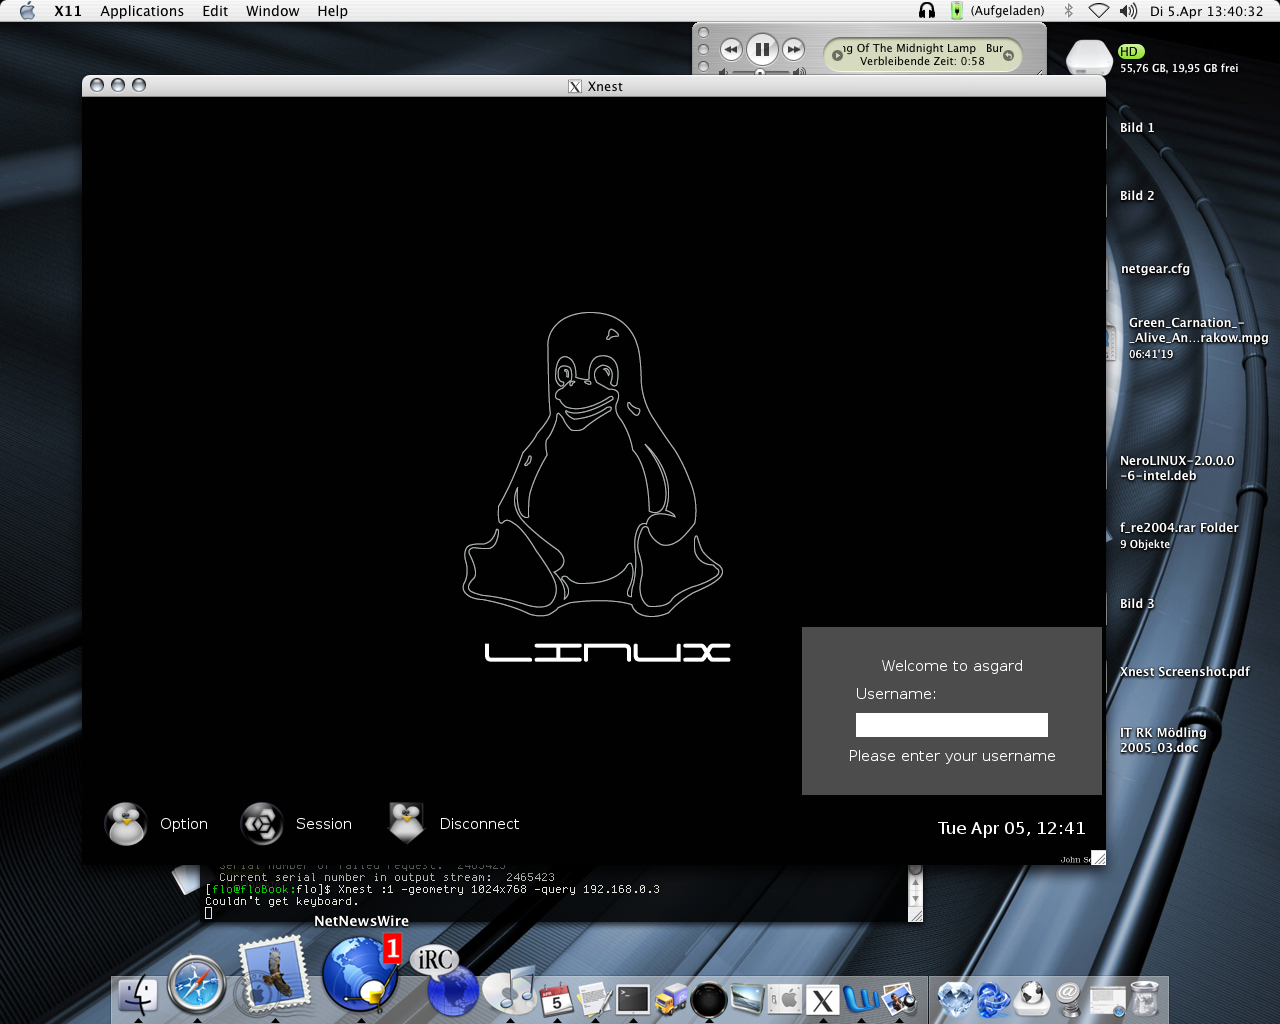
Linux Box im LAN

Dies setzt voraus dass XDMCP für Entfernte Anmeldungen aktiviert ist und der lokale X-Server läuft.
Xnest :1 -geometry 1024x768 -query 192.168.0.3

Erklärung:

  • Xnest :1 startet einen neuen X-Server in einem Fenster und weißt Display 1 zu (da auf Display 0 bereits der lokale X-Server läuft)
  • -geometry 1024×768 legt fest wie groß das Fenster sein soll
  • -query 192.168.0.3 unter dieser IP ist mein Linux Computer im LAN zu erreichen

Der Anmeldebildschirm über XDMCP Der GNOME Desktop in Xnest

Linux Box per SSH

ssh -XC yourdomain.com
Xnest :1 -geometry 1024x768 &
xterm -display :1

Erklärung:

  • ssh -XC yourdomain.com startet eine SSH verbindung mit aktiviertem x-forwarding und Kompression (ist schneller) zu der gewünschten Linux Kiste
  • Xnest :1 -geometry 1024×768 & macht das gleiche wie im ersten Beispiel, nur wird diesmal das Xnest Fenster über die SSH Verbindung am lokalen X-Server dargestellt und danach die Konsole wieder freigegeben (durch das Zeichen “&”)
  • xterm -display :1 startet ein Terminal und stellt es auf Display :1 dar, dieses Display ist das Xnest Fenster, welches wiederum am lokalen X-Server dargestellt wird

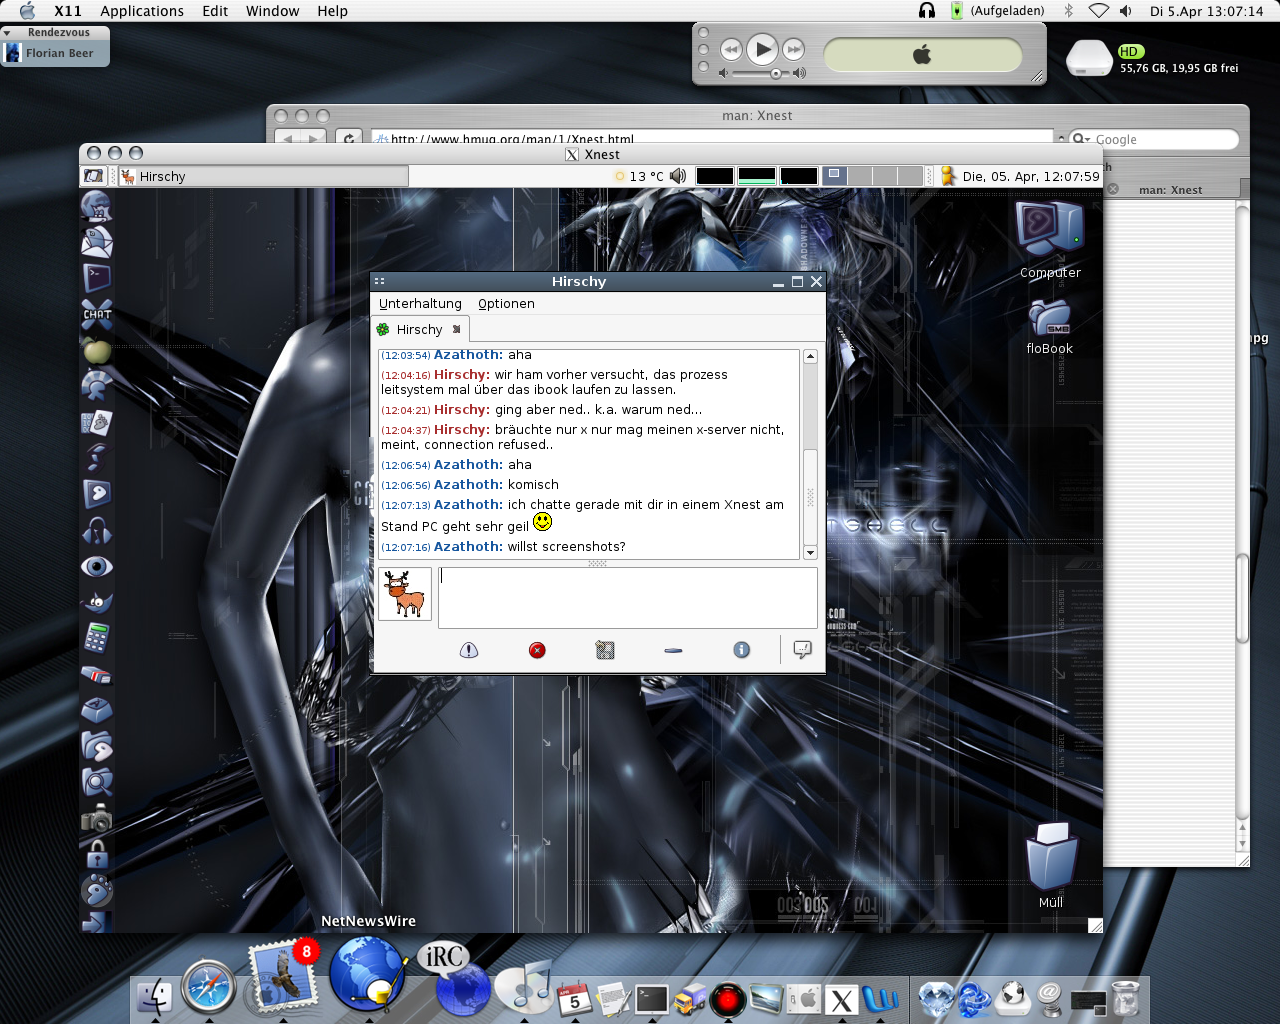
Als letztes muss man nur noch in dem xterm im Xnest Fenster ein DE oder einen WM starten. In meinem Fall habe ich “gnome-session” eingegeben um den GNOME 2.0 Desktop zu starten.

Ein einfacher und schneller Weg um Packages zu sichern um beispielsweise ein System zu clonen.

– Use “dpkg –get-selections > selections.txt” on your current system.
– Copy the “selections.txt” file over to your target system.
– Run “dpkg –set-selections < selections.txt" on your target system. - Finally, "apt-get dselect-upgrade" will download and install the packages.

Die jeweiligen configs noch aus /etc und man sollte eine gleichwertige Kopie haben.

I’m running a mailserver using Virtual Exim. This is a very cool way to manage mail users in a MySQL database. (for a very good HOWTO, try this link. Only in german! 🙁 )
It is really easy to add new domains, aliasdomains etc. all in a rather convinient PHP-based webinterface. As I startet hosting a few domains for some friends, they started asking for a way to get mails from other accounts and fetch it to their IMAP account on my server. I knew that fetchmail could do that. The downside is that fetchmail requires system users, which would make the whole Virtual Exim thing useless again.
So I decidet to hack my way throug vexim and look for a way to implement fetchmail in the vexim webinterface.

Outline of the whole idea:
Provide a form on the user-page in vexim, where the users could put in their fetchmail commands.
Save the individual fetchmail commands in seperate files in a subdirectory of the vexim installation.
Write a shell script that looks for all the files in the subdir and assemble them in a single file. Then call fetchmail and point it to this file.
Voila! fetchmail gets all the user’s mails and delivers it to their local mailboxes.

The following is my “quick & dirty” implementation:

  1. First make a new subdirectory for the individual fetchmail files and make it writeable to the webserver process. (www-data on Debian)
    mkdir fetchmail chown www-data:www-data fetchmail
  2. Then implement the new code in the userchange.php file of vexim at the apropriate place
    (I put it at the very end of the second form, right before the “Submit Profile” button but still in the PHP block)

    # Fetchmail Hack
    $datafile = "fetchmail/".$_SESSION['user_id'].".fm";
    if (file_exists($datafile)) {
        $output = join("",file($datafile));
        $output = stripslashes($output);
    }
    print "

    Fetchmail: "
    ; print "Sample:
    server post.isp.net
    proto pop3
    user USERNAME-AT-YOUR-ISP is YOUR_ADRESS_HERE here
    password SECRET"
    ; print ""; print "Caution: Mail will be fetched and immediately deleted from the remote server!
    Use the keep keyword if you do not want this."
    ; # end fetchmail hack

  3. Put the following in userchangesubmit.php right bevore "# Finally 'the rest' which is handled by the profile form"

    # Fetchmail Hack
    $file = "fetchmail/".$_SESSION['user_id'].".fm";
    if($_POST['fetchmail']){
        if(!$handle = fopen($file,"w")) {
            echo "couldn't open file ";
        }
        if(!fwrite ($handle, $_POST['fetchmail'])) {
            echo "couldn't write file ";
        }
        fclose ($handle);
    } else {
        unlink($file);
    }
    # end fetchmail hack

  4. While editing this file I found a bug, which rendered all the form fields, except the two password fields at the top, on this page totally unusable.
    You have to find the following two lines:

    sa_tag={$_POST['sa_tag']},
    sa_refuse={$_POST['sa_refuse']},


    and change them to:
    sa_tag='{$_POST['sa_tag']}',
    sa_refuse='{$_POST['sa_refuse']}',

    otherwise the SQL query will always return an error.

  5. Now the last part:
    Save the following little shellscript, I named mine fetchme

    # #!/bin/bash
    
    # remove old file
    rm fetch_out
    
    # assembling file: fetch_out
    for file in /htdocs/vexim/fetchmail/* ; do
    cat $file >> fetch_out
    echo " " >> fetch_out
    echo " " >> fetch_out
    done
    
    # chmodding
    chmod 600 fetch_out
    
    # now fetching
    fetchmail -s -f fetch_out
    

  6. Lastly you only have to fire up a cron job to run the script every five minutes or so.
  7. Please feel free to comment and add enhancements.

nach langem probieren und suchen, hab ich endlich ein einfaches und leicht verständliches HOWTO gefunden um SSH dazu zu bewegen, dass ich nicht immer ein passwort eingeben muss wenn ich mich einlogge.

# On your local machine
$ ssh-keygen -t dsa
$ cd ~/.ssh
# for safe keeping
$ mv id_dsa.pub id_dsa.your_machine.pub
# Log in to the remote machine and create your .ssh key there
$ ssh remote_machine
$ ssh-keygen -t dsa
$ exit

# Back on your local machine
$ scp id_dsa.your_machine.pub remote_machine:.ssh/.

# Back to the remote machine
$ ssh remote_machine
$ cd .ssh
$ cat id_dsa.your_machine.pub >> authorized_keys2
$ chmod 600 authorized_keys2
$ exit

… so leicht kanns sein, wenn man mal weiß wies geht 🙂
das funktioniert natürlich nicht nur auf Linux Systemen, sondern auch problemlos auf meinem iBook unter OS X.